Storage and Collaboration
The storage feature allows user to access, store, audit, collaborate, synchronize, and run further analysis on the baseline, comparison, and the simulated data series across the entire model scenarios. Users require a dedicated ValQ workspace access authenticated by their Office 365 credentials.
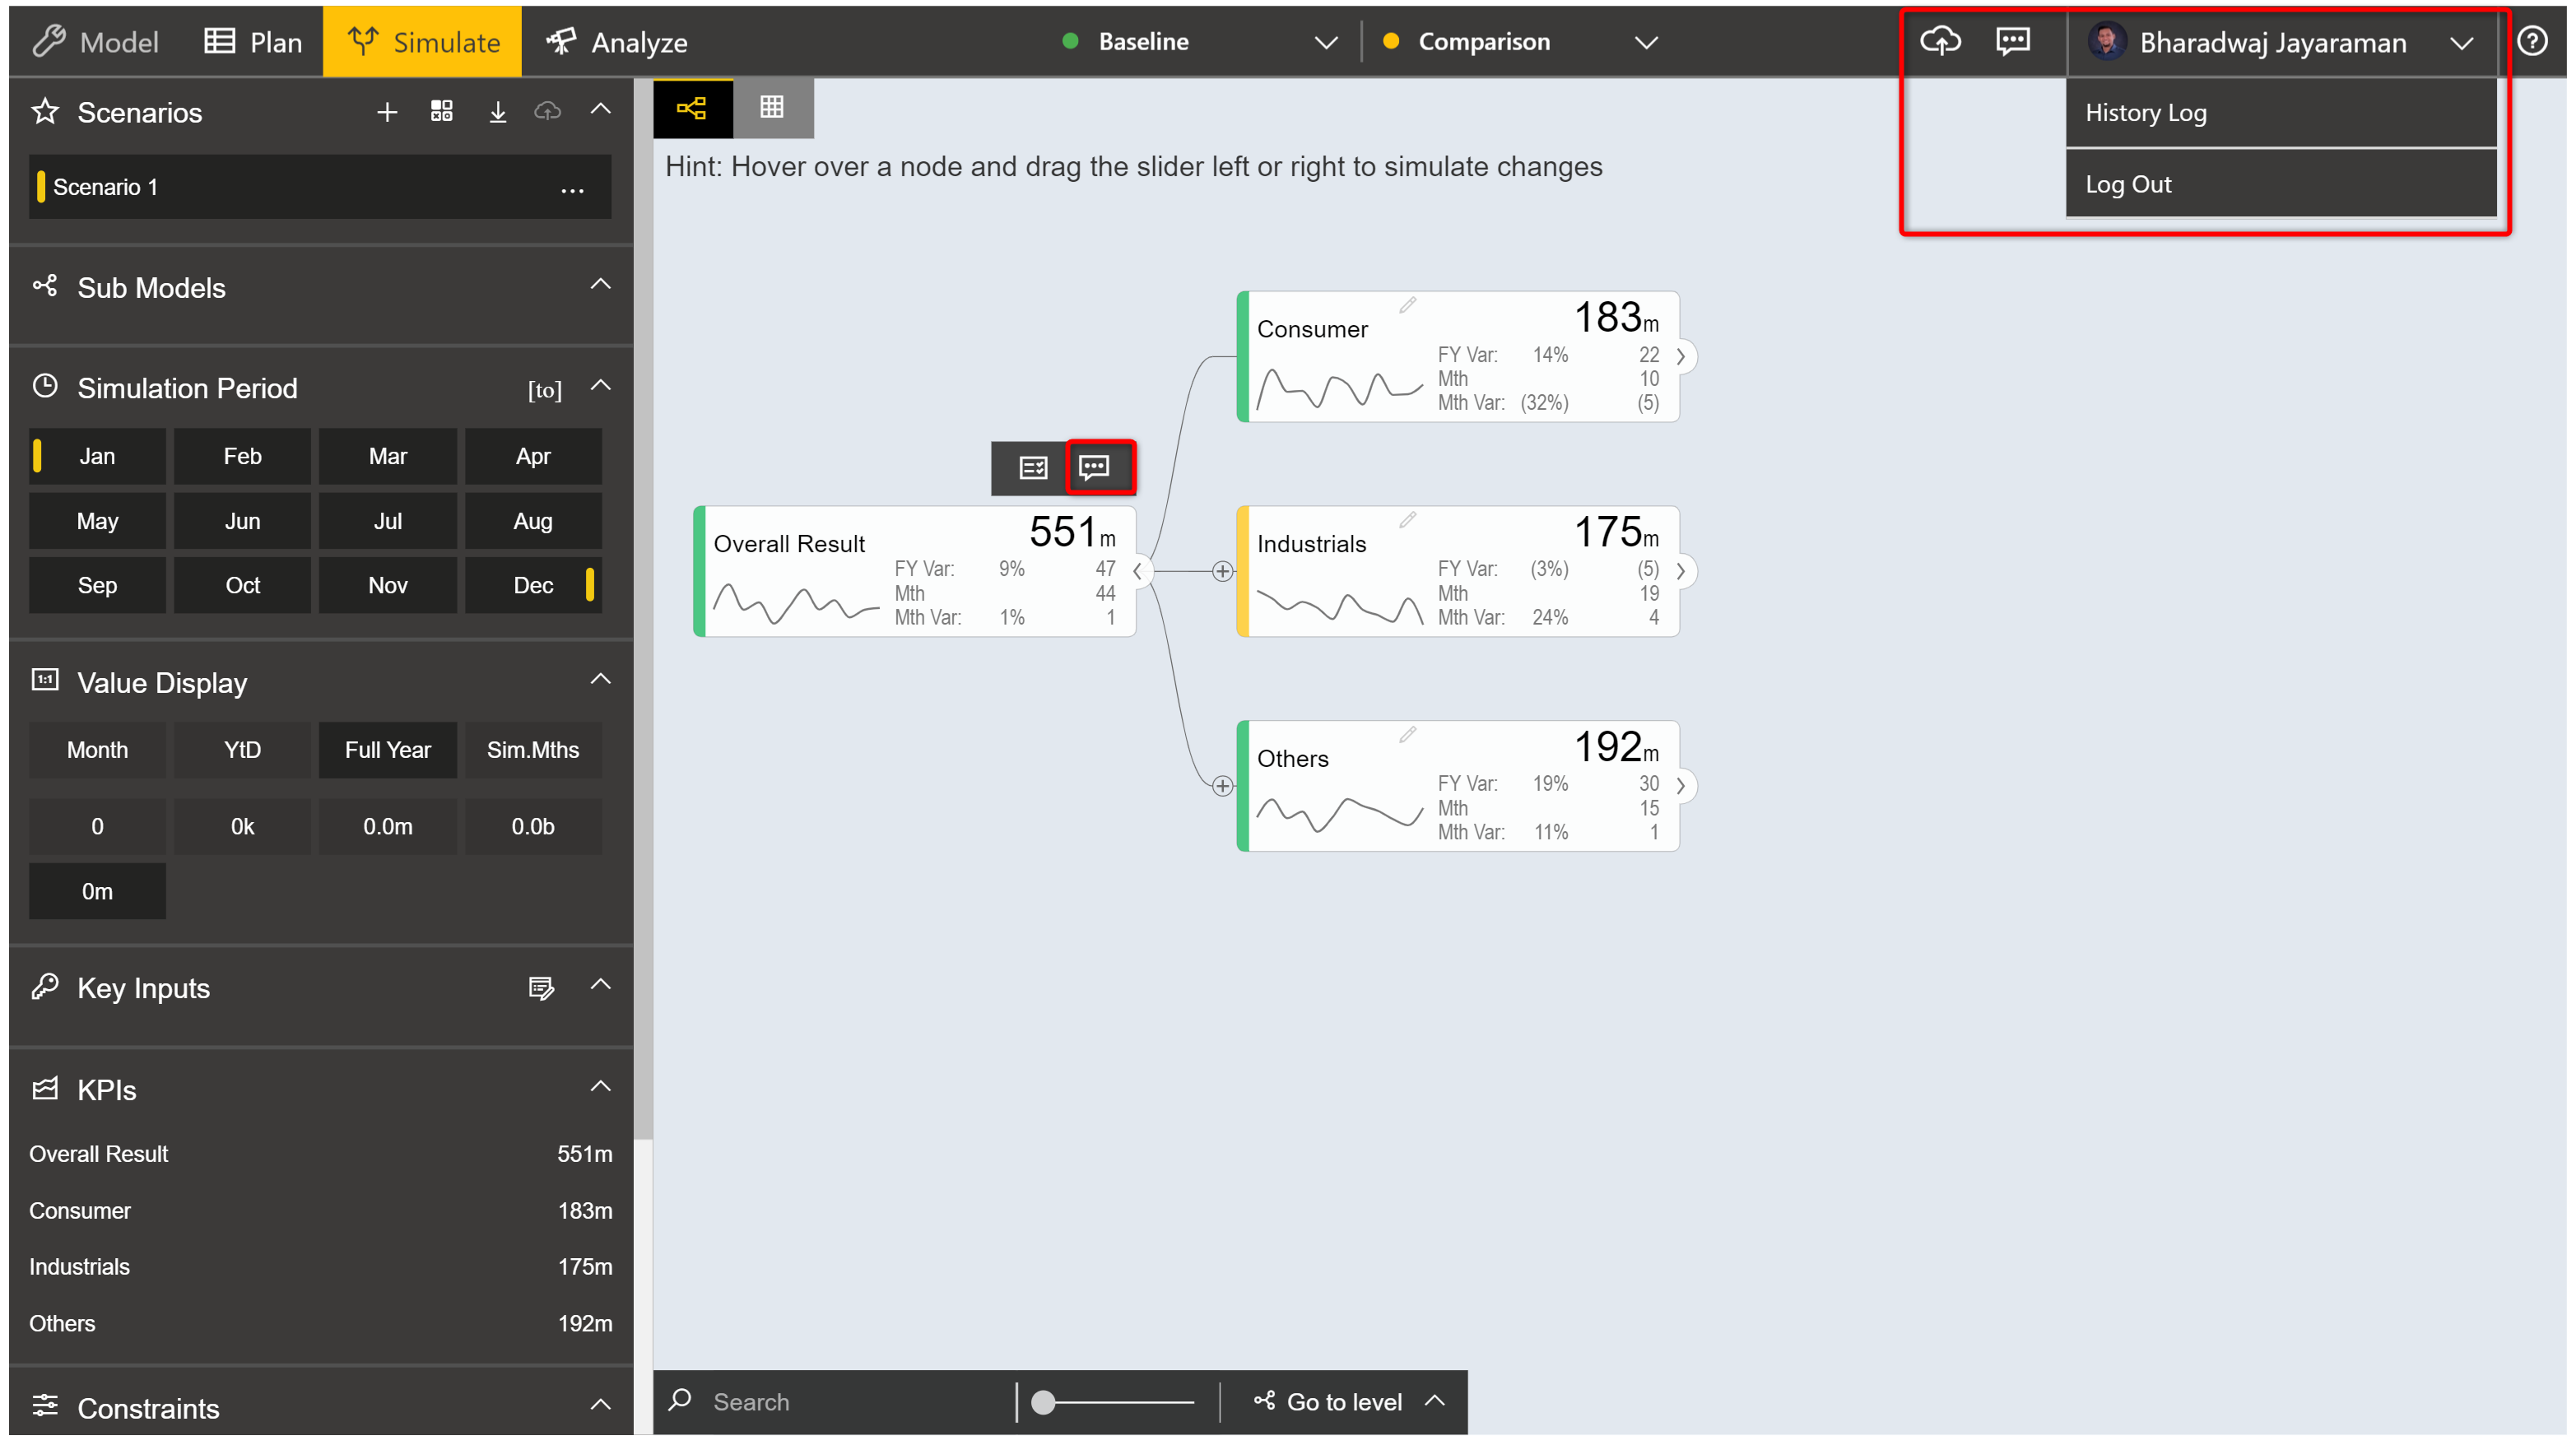
After successful login, user can see additional options such as Sync, Comments, and History Log
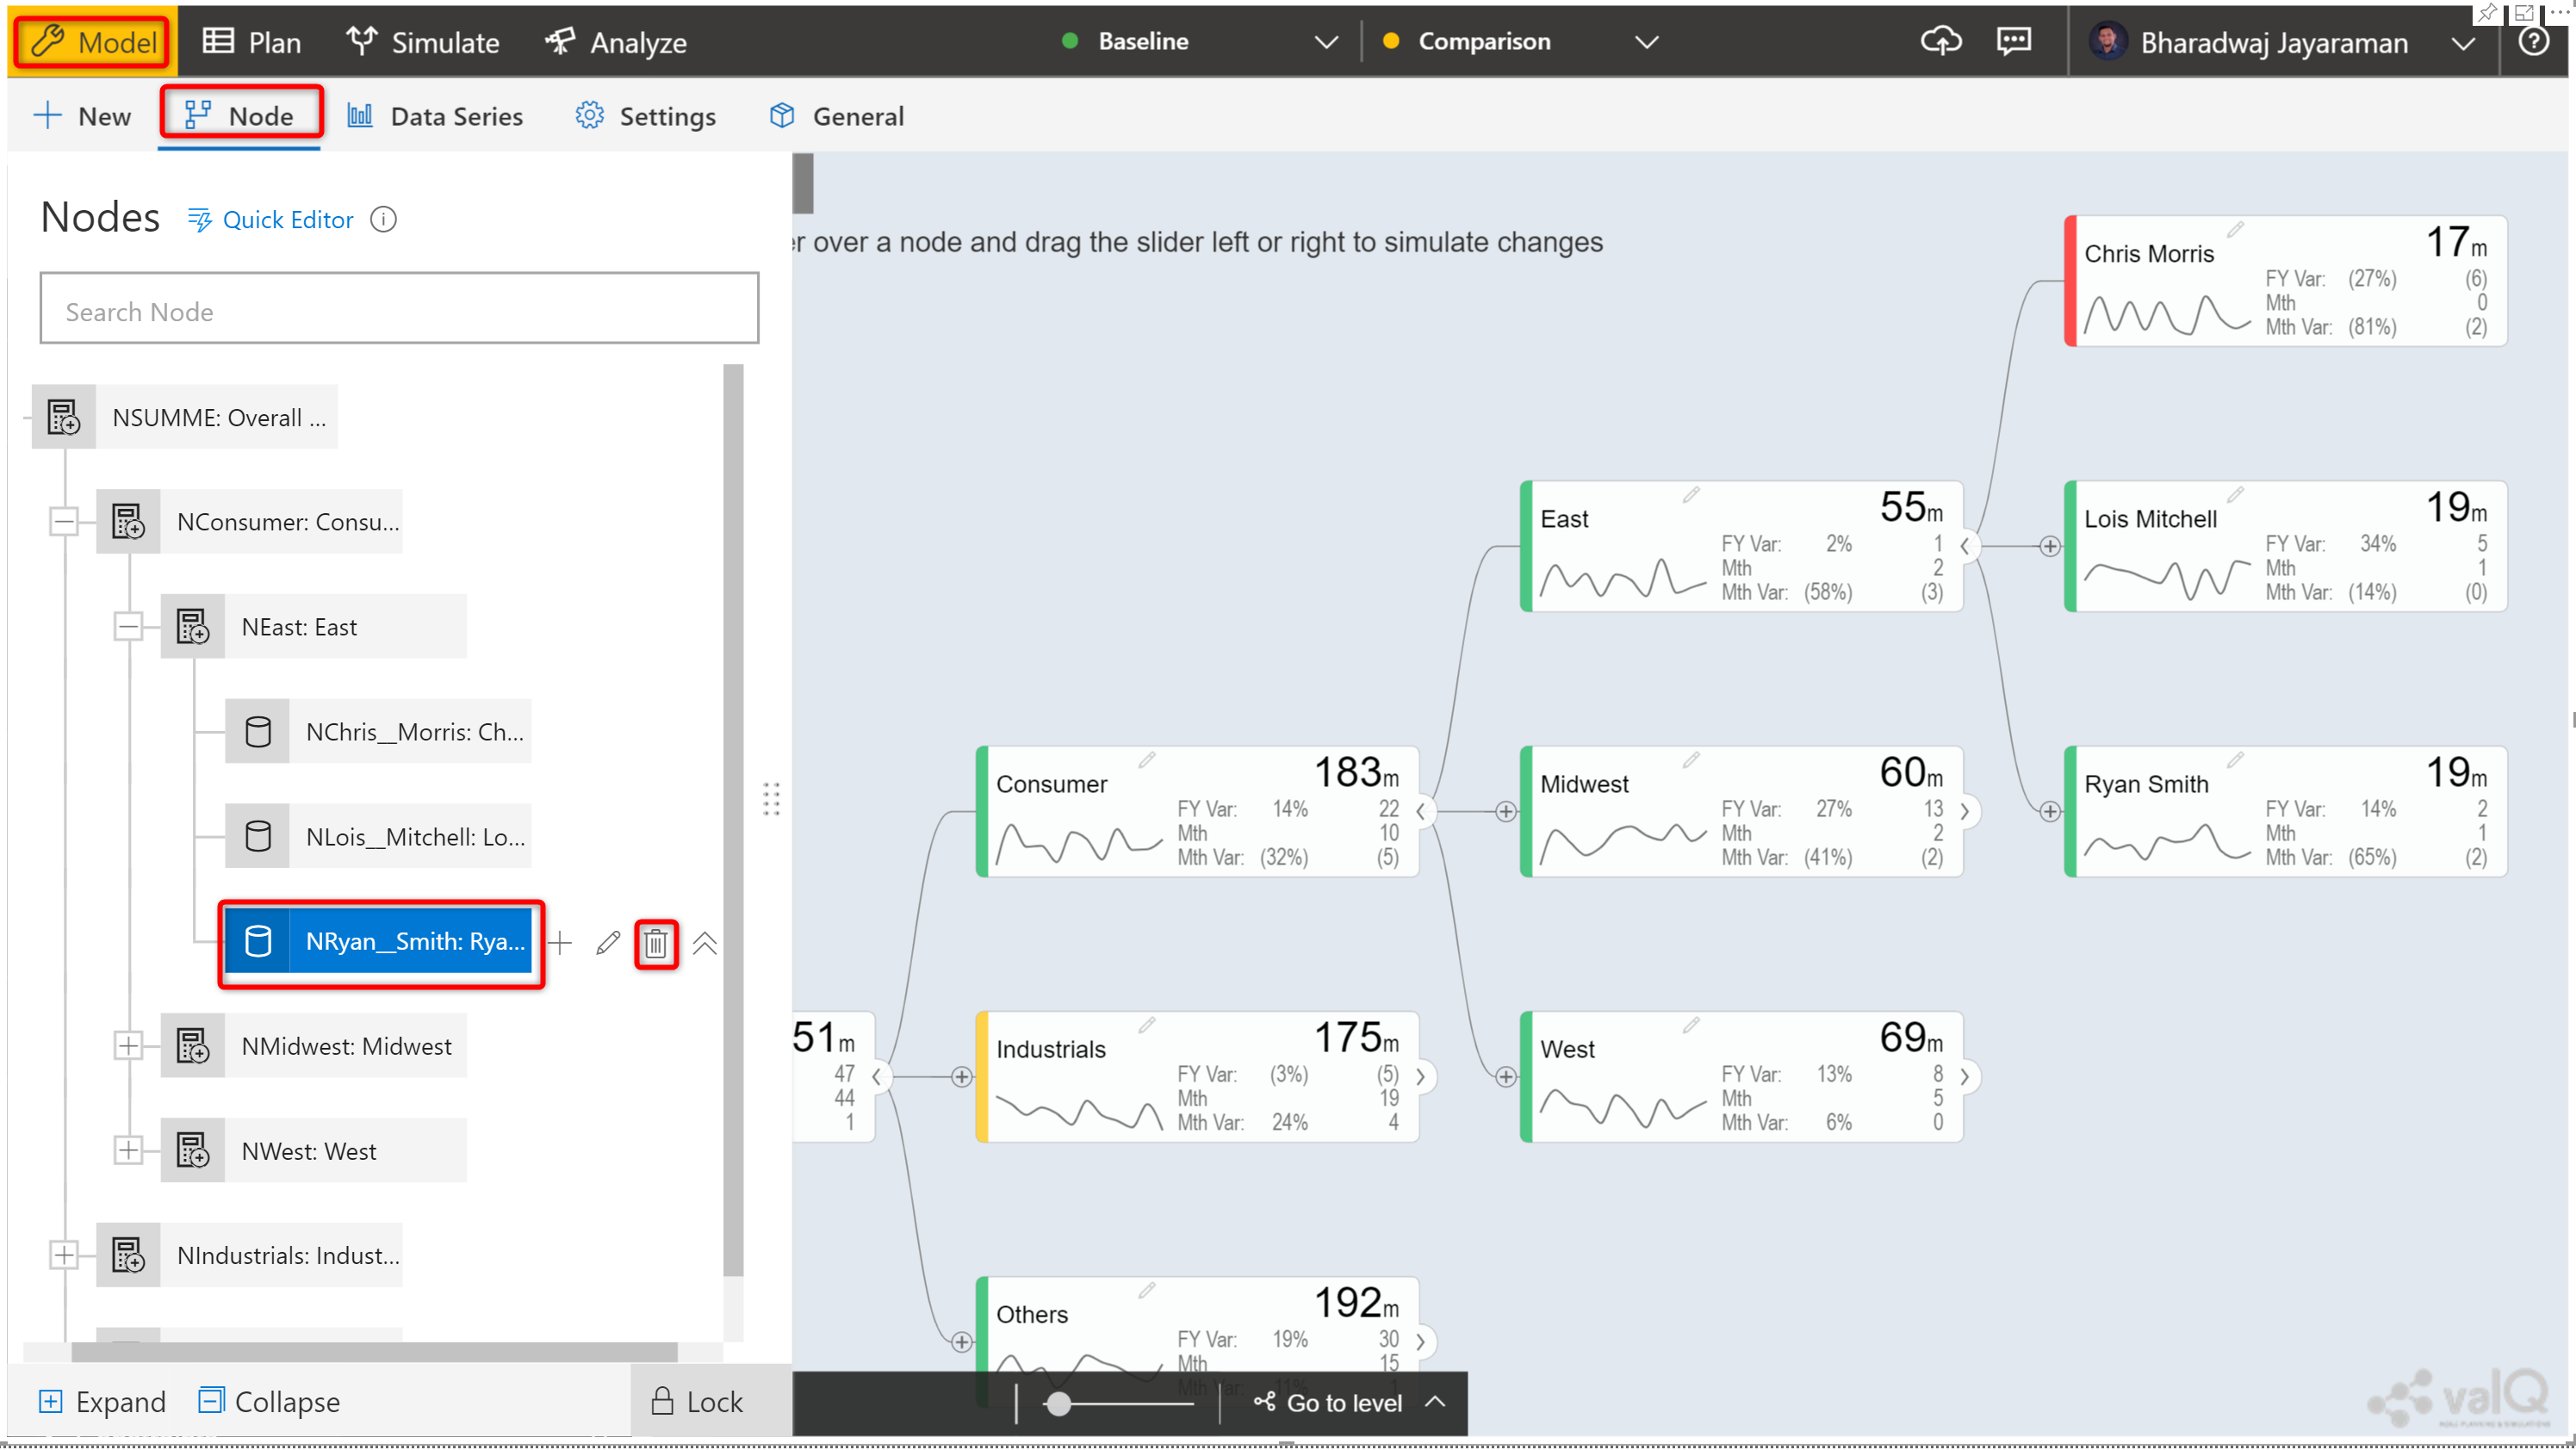
In the screenshot model, lets assume the user deletes a node ‘Ryan Smith’
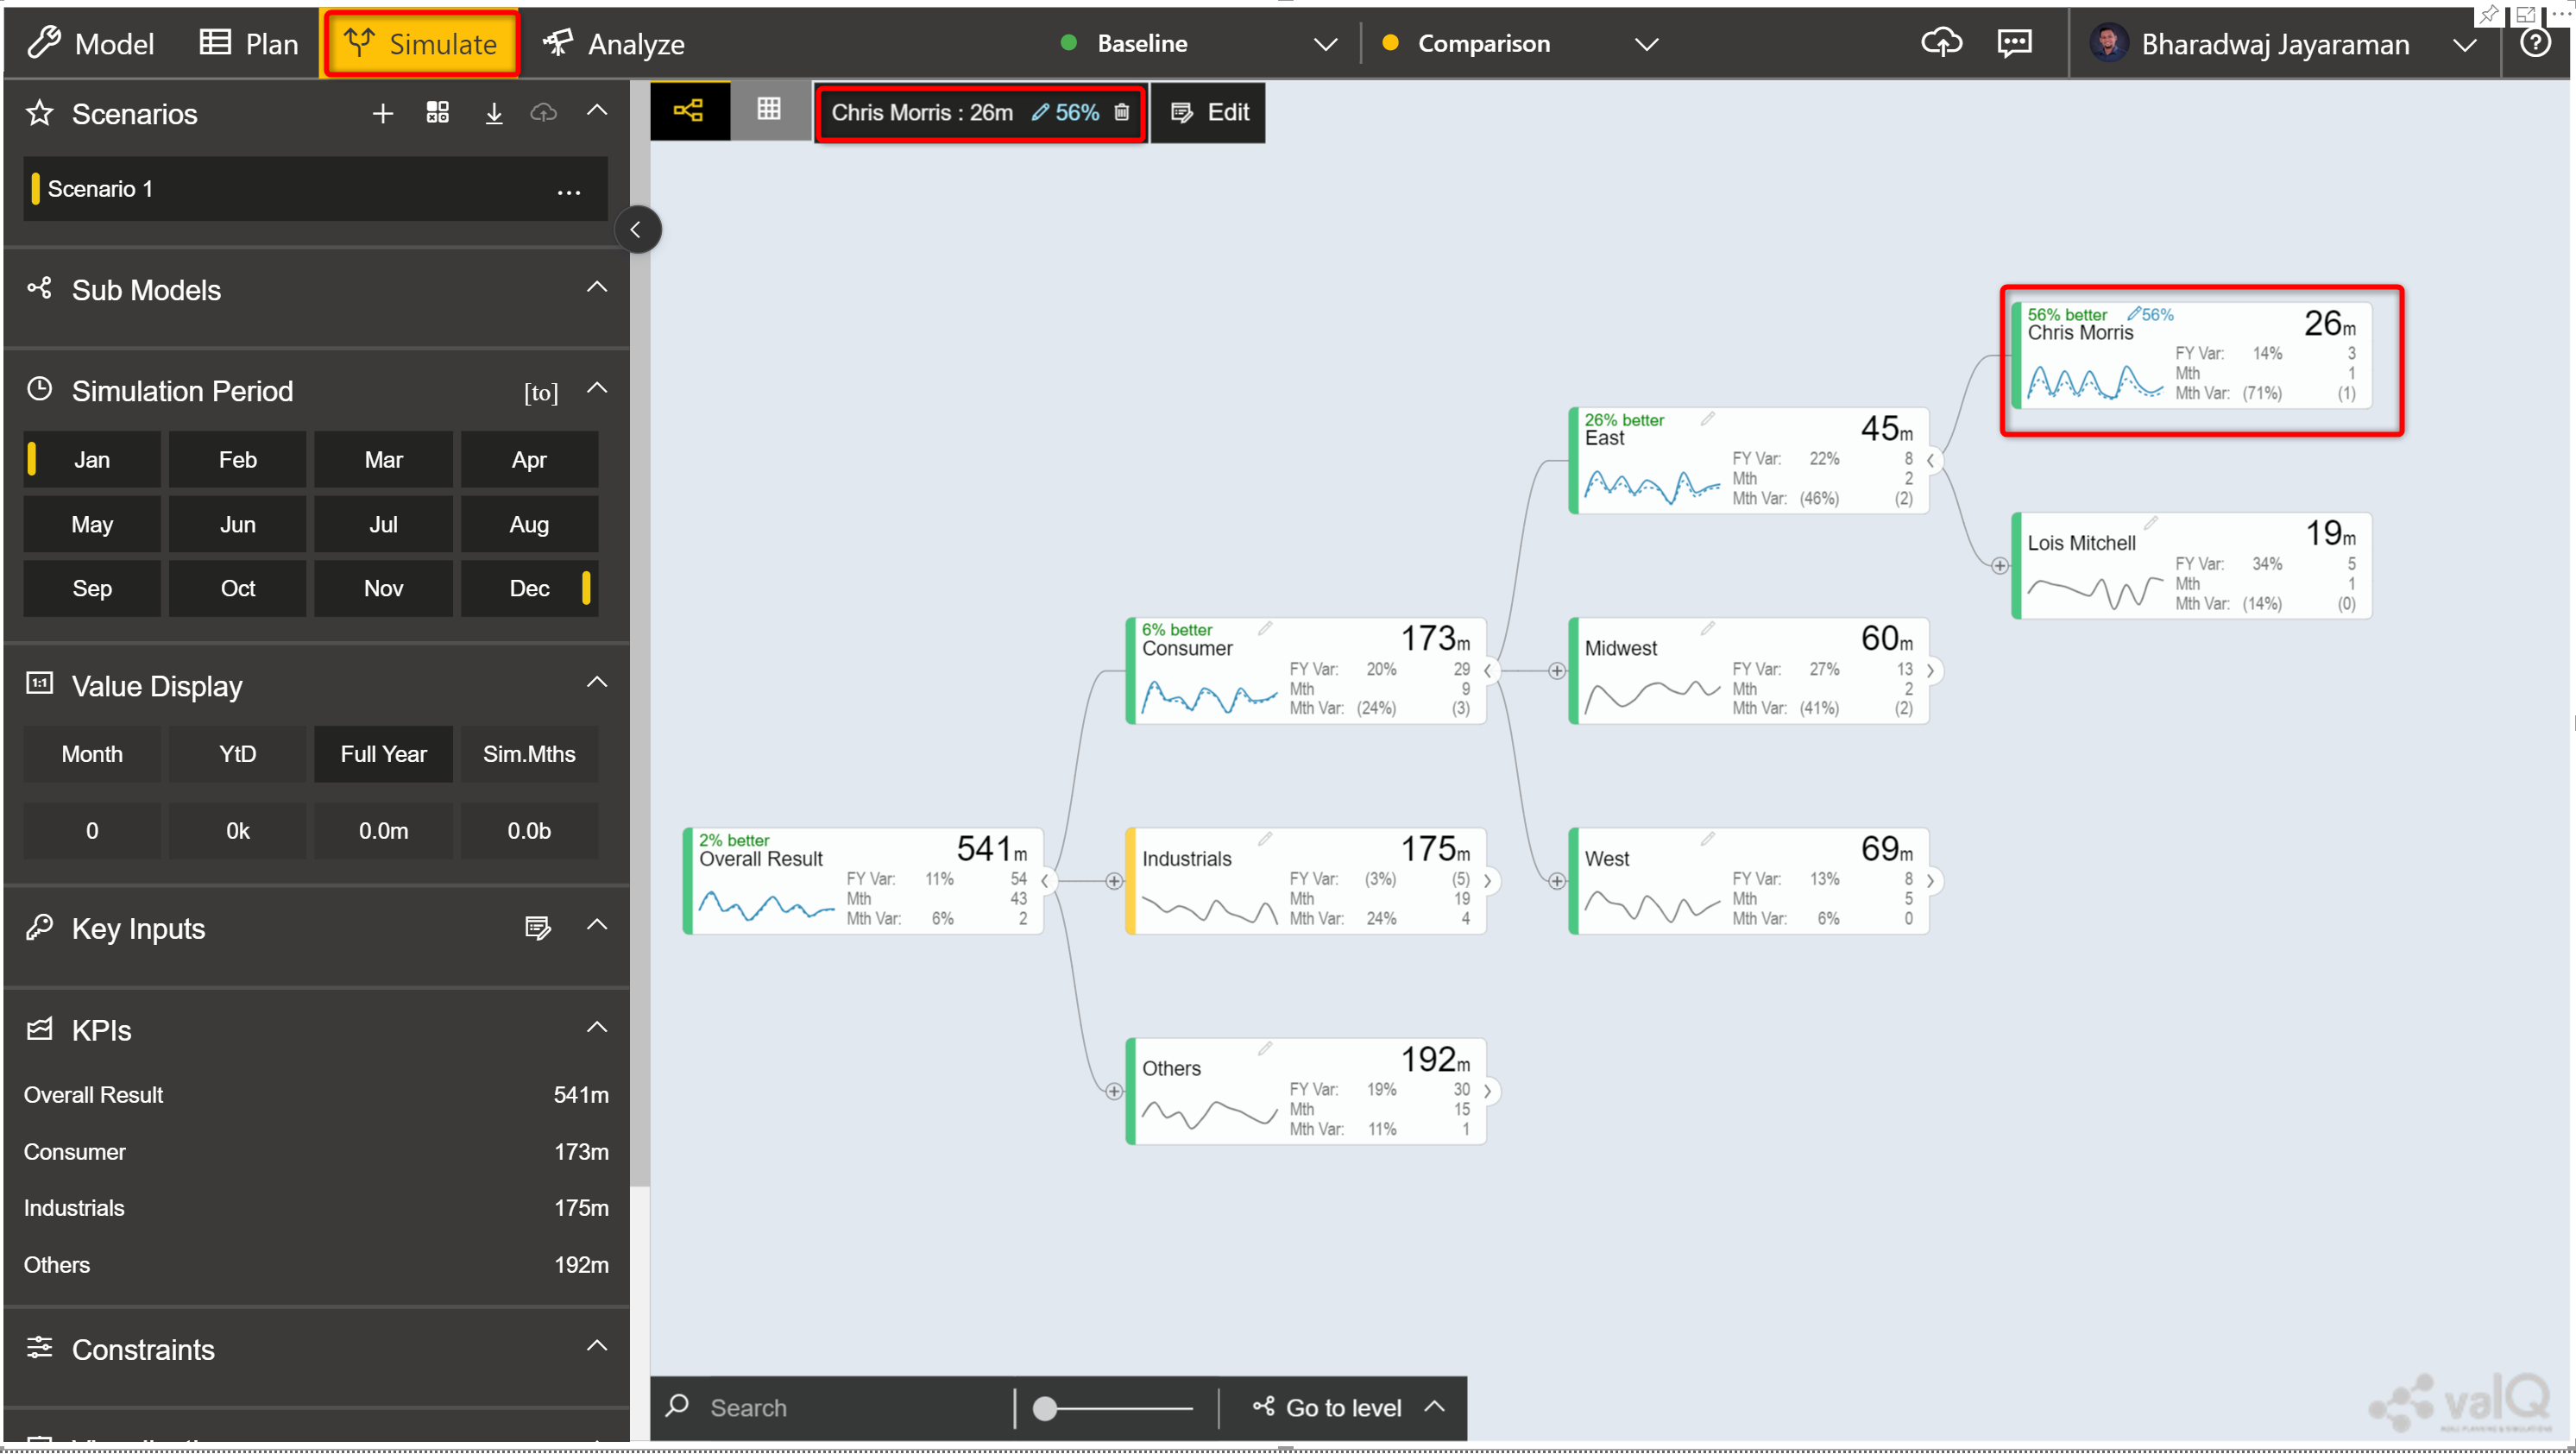
Lets also assume the user simulates on another node ‘Chris Morris’
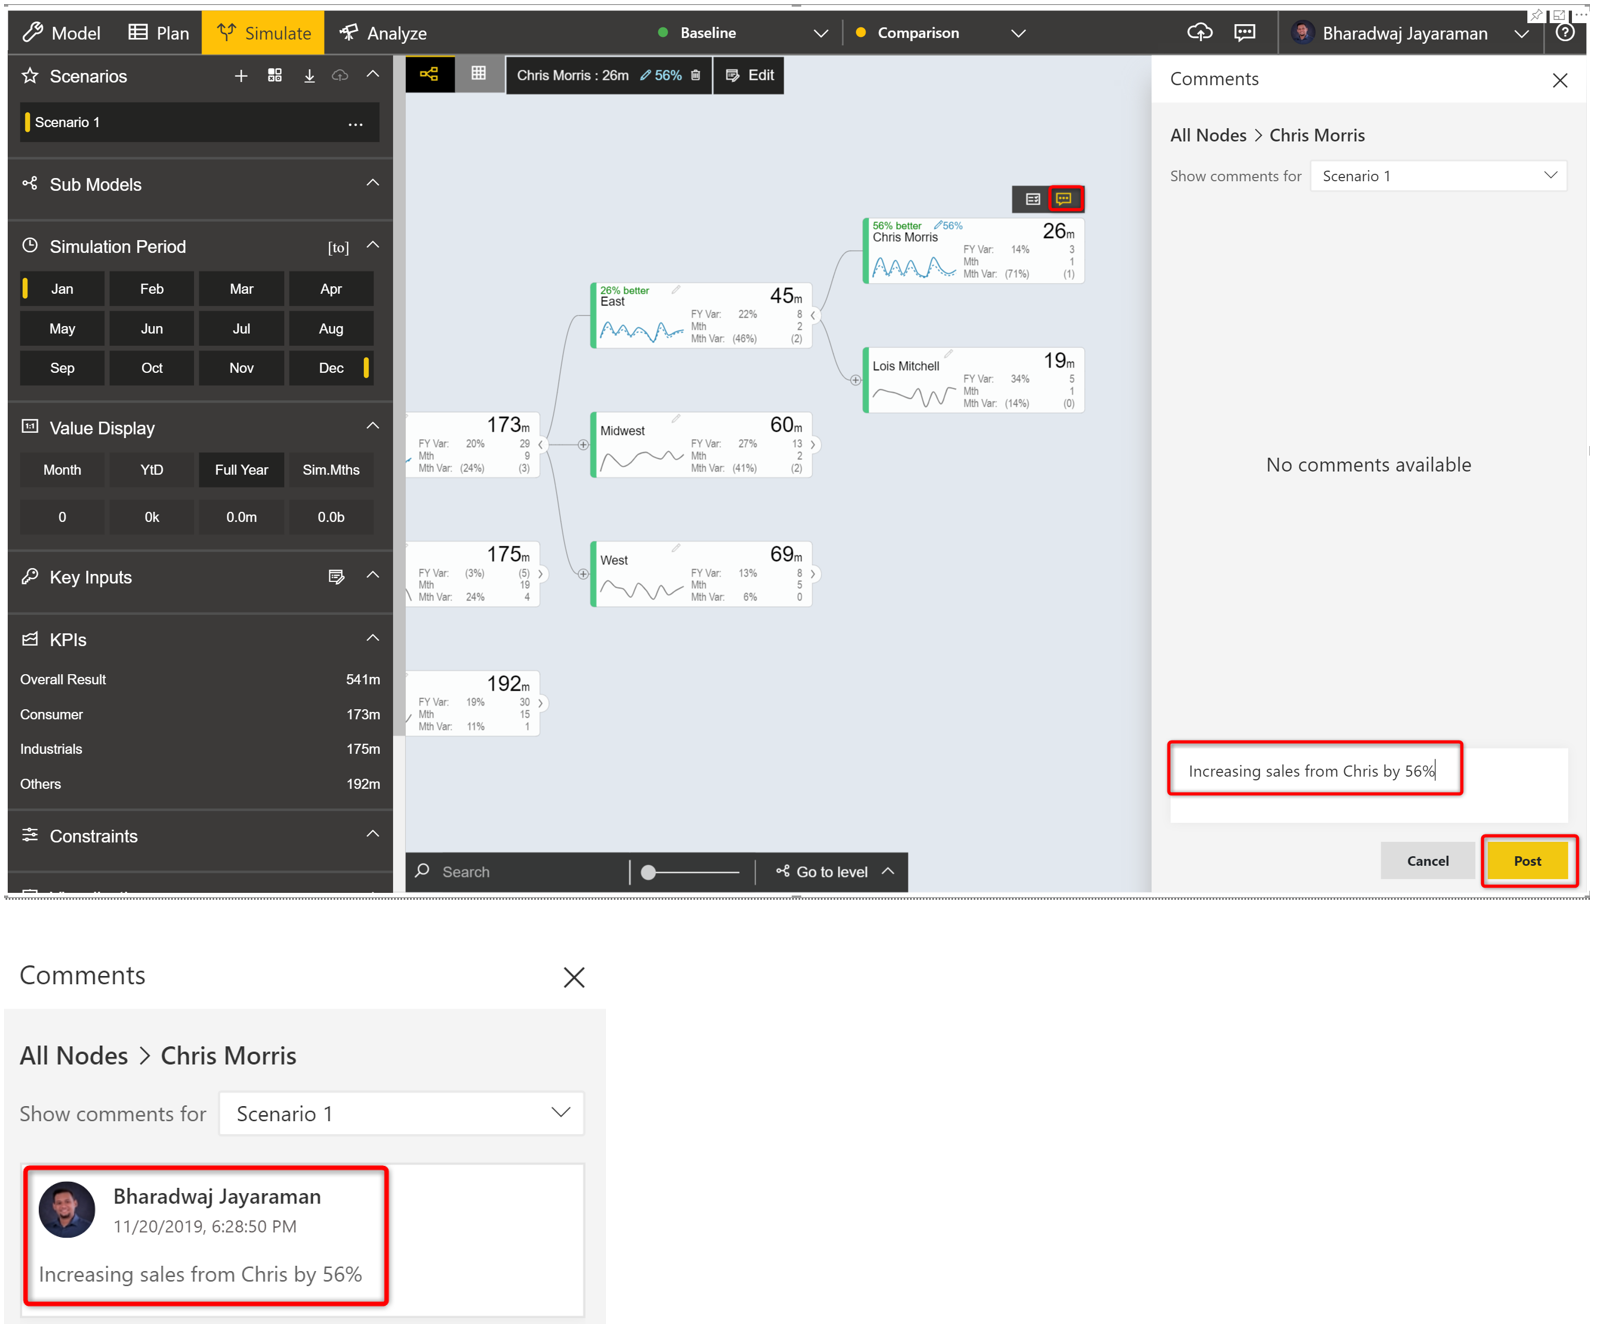
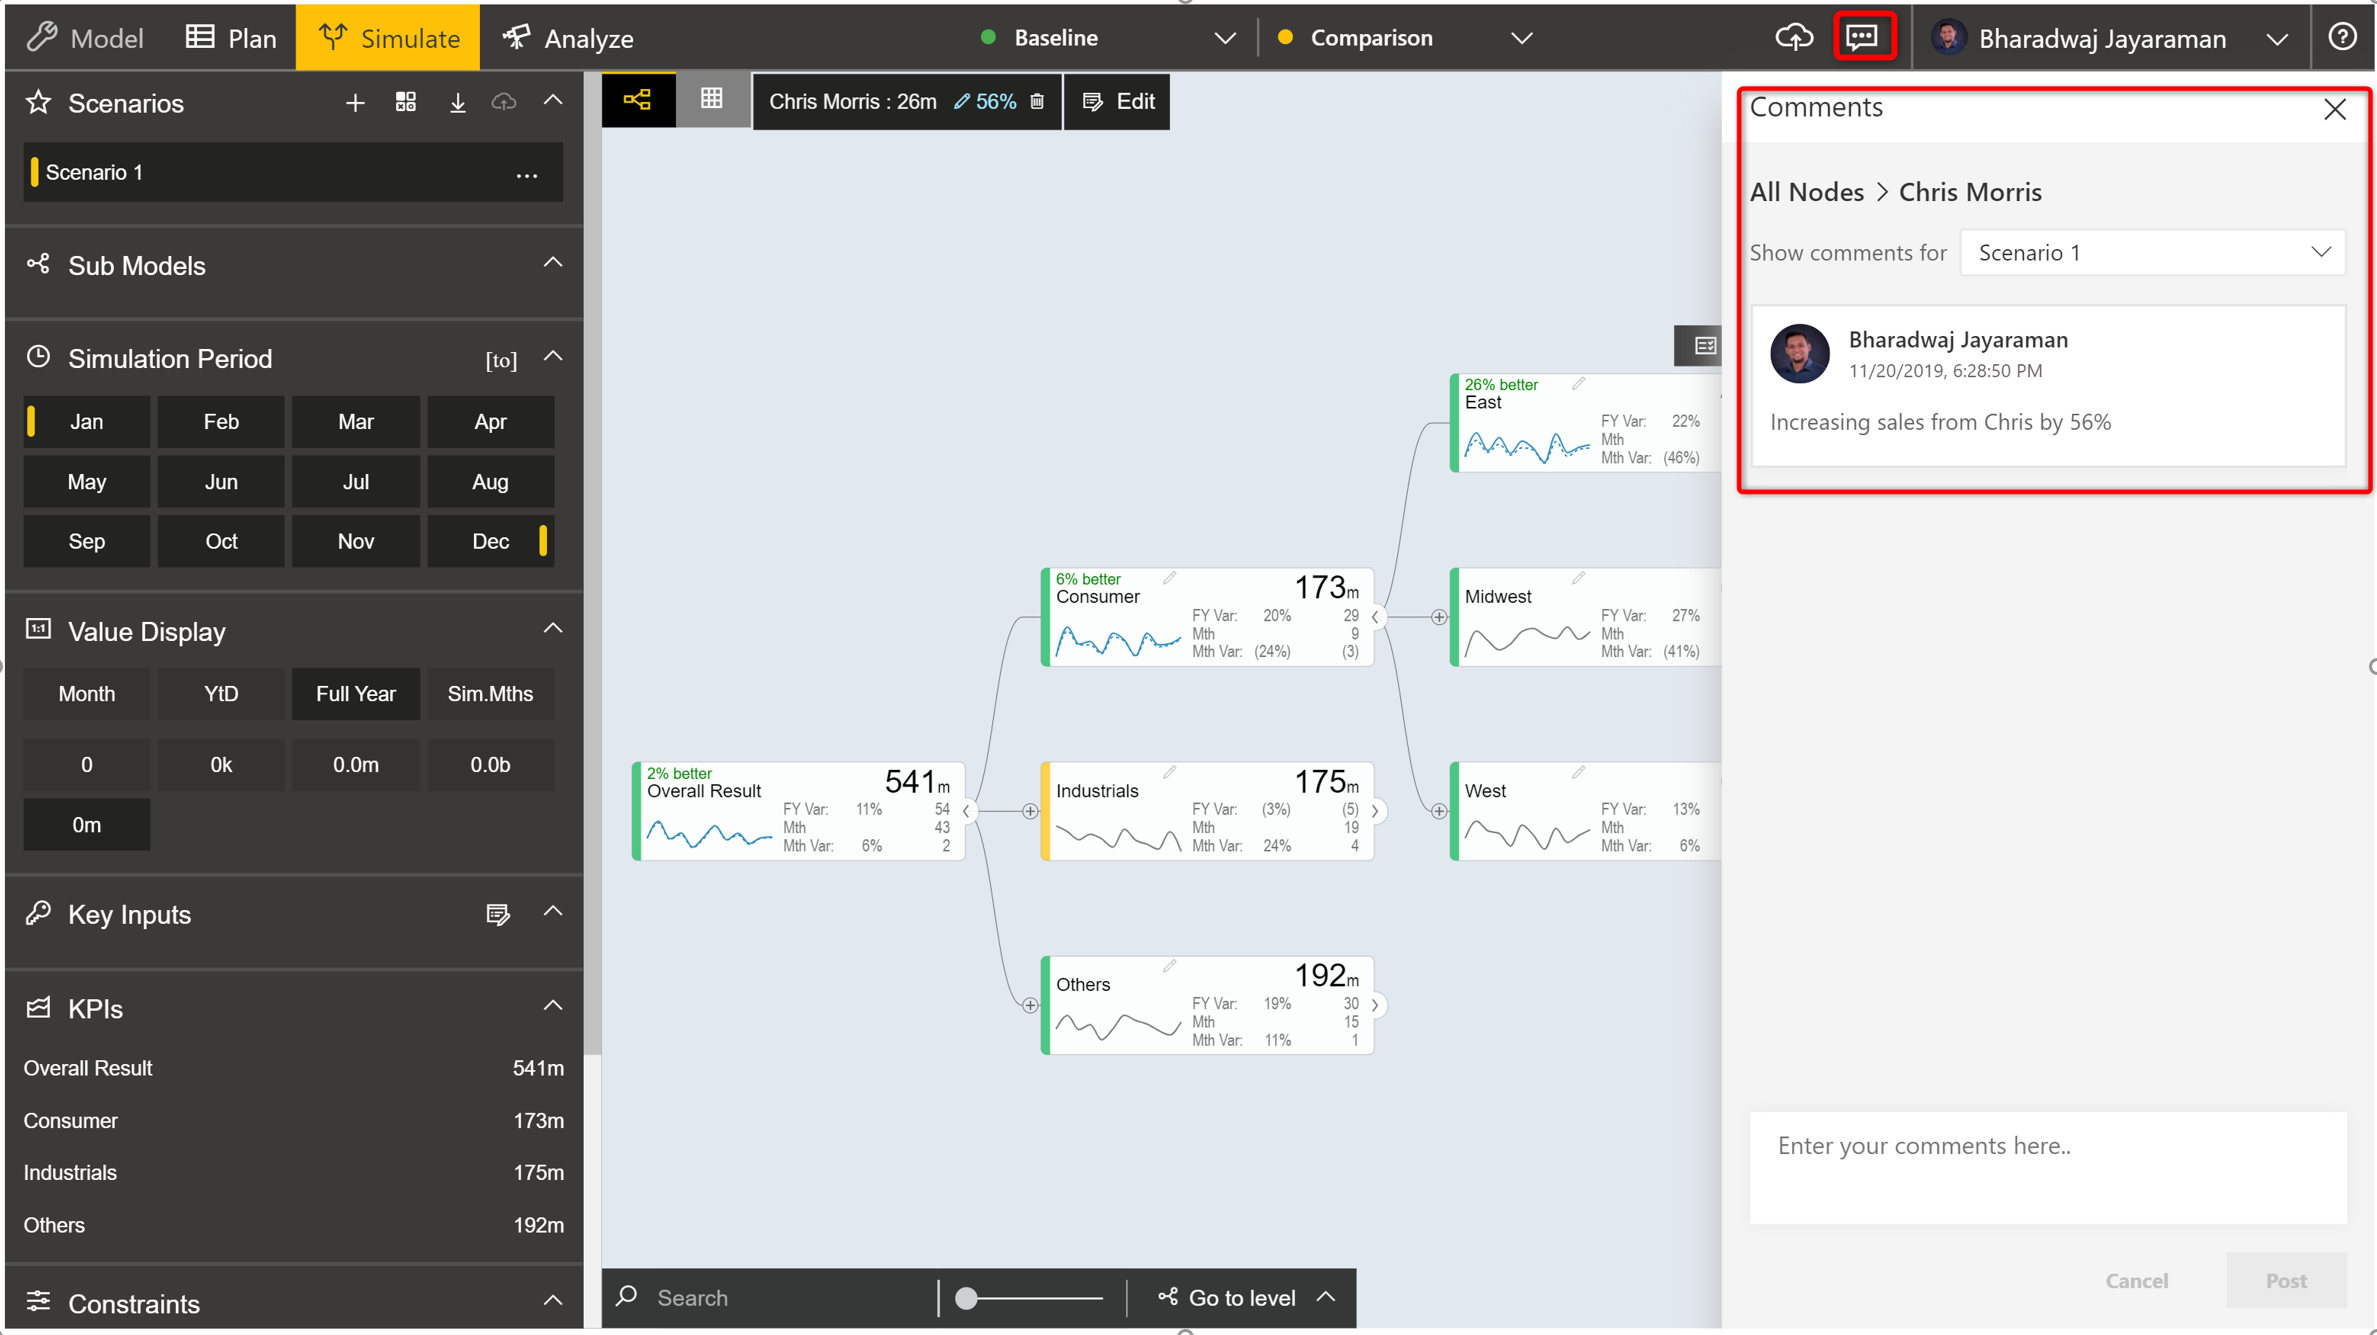
User can comment on the changes made by clicking the ‘Comments’ icon on top of the node. The comment along with the username and time log is saved and displayed.
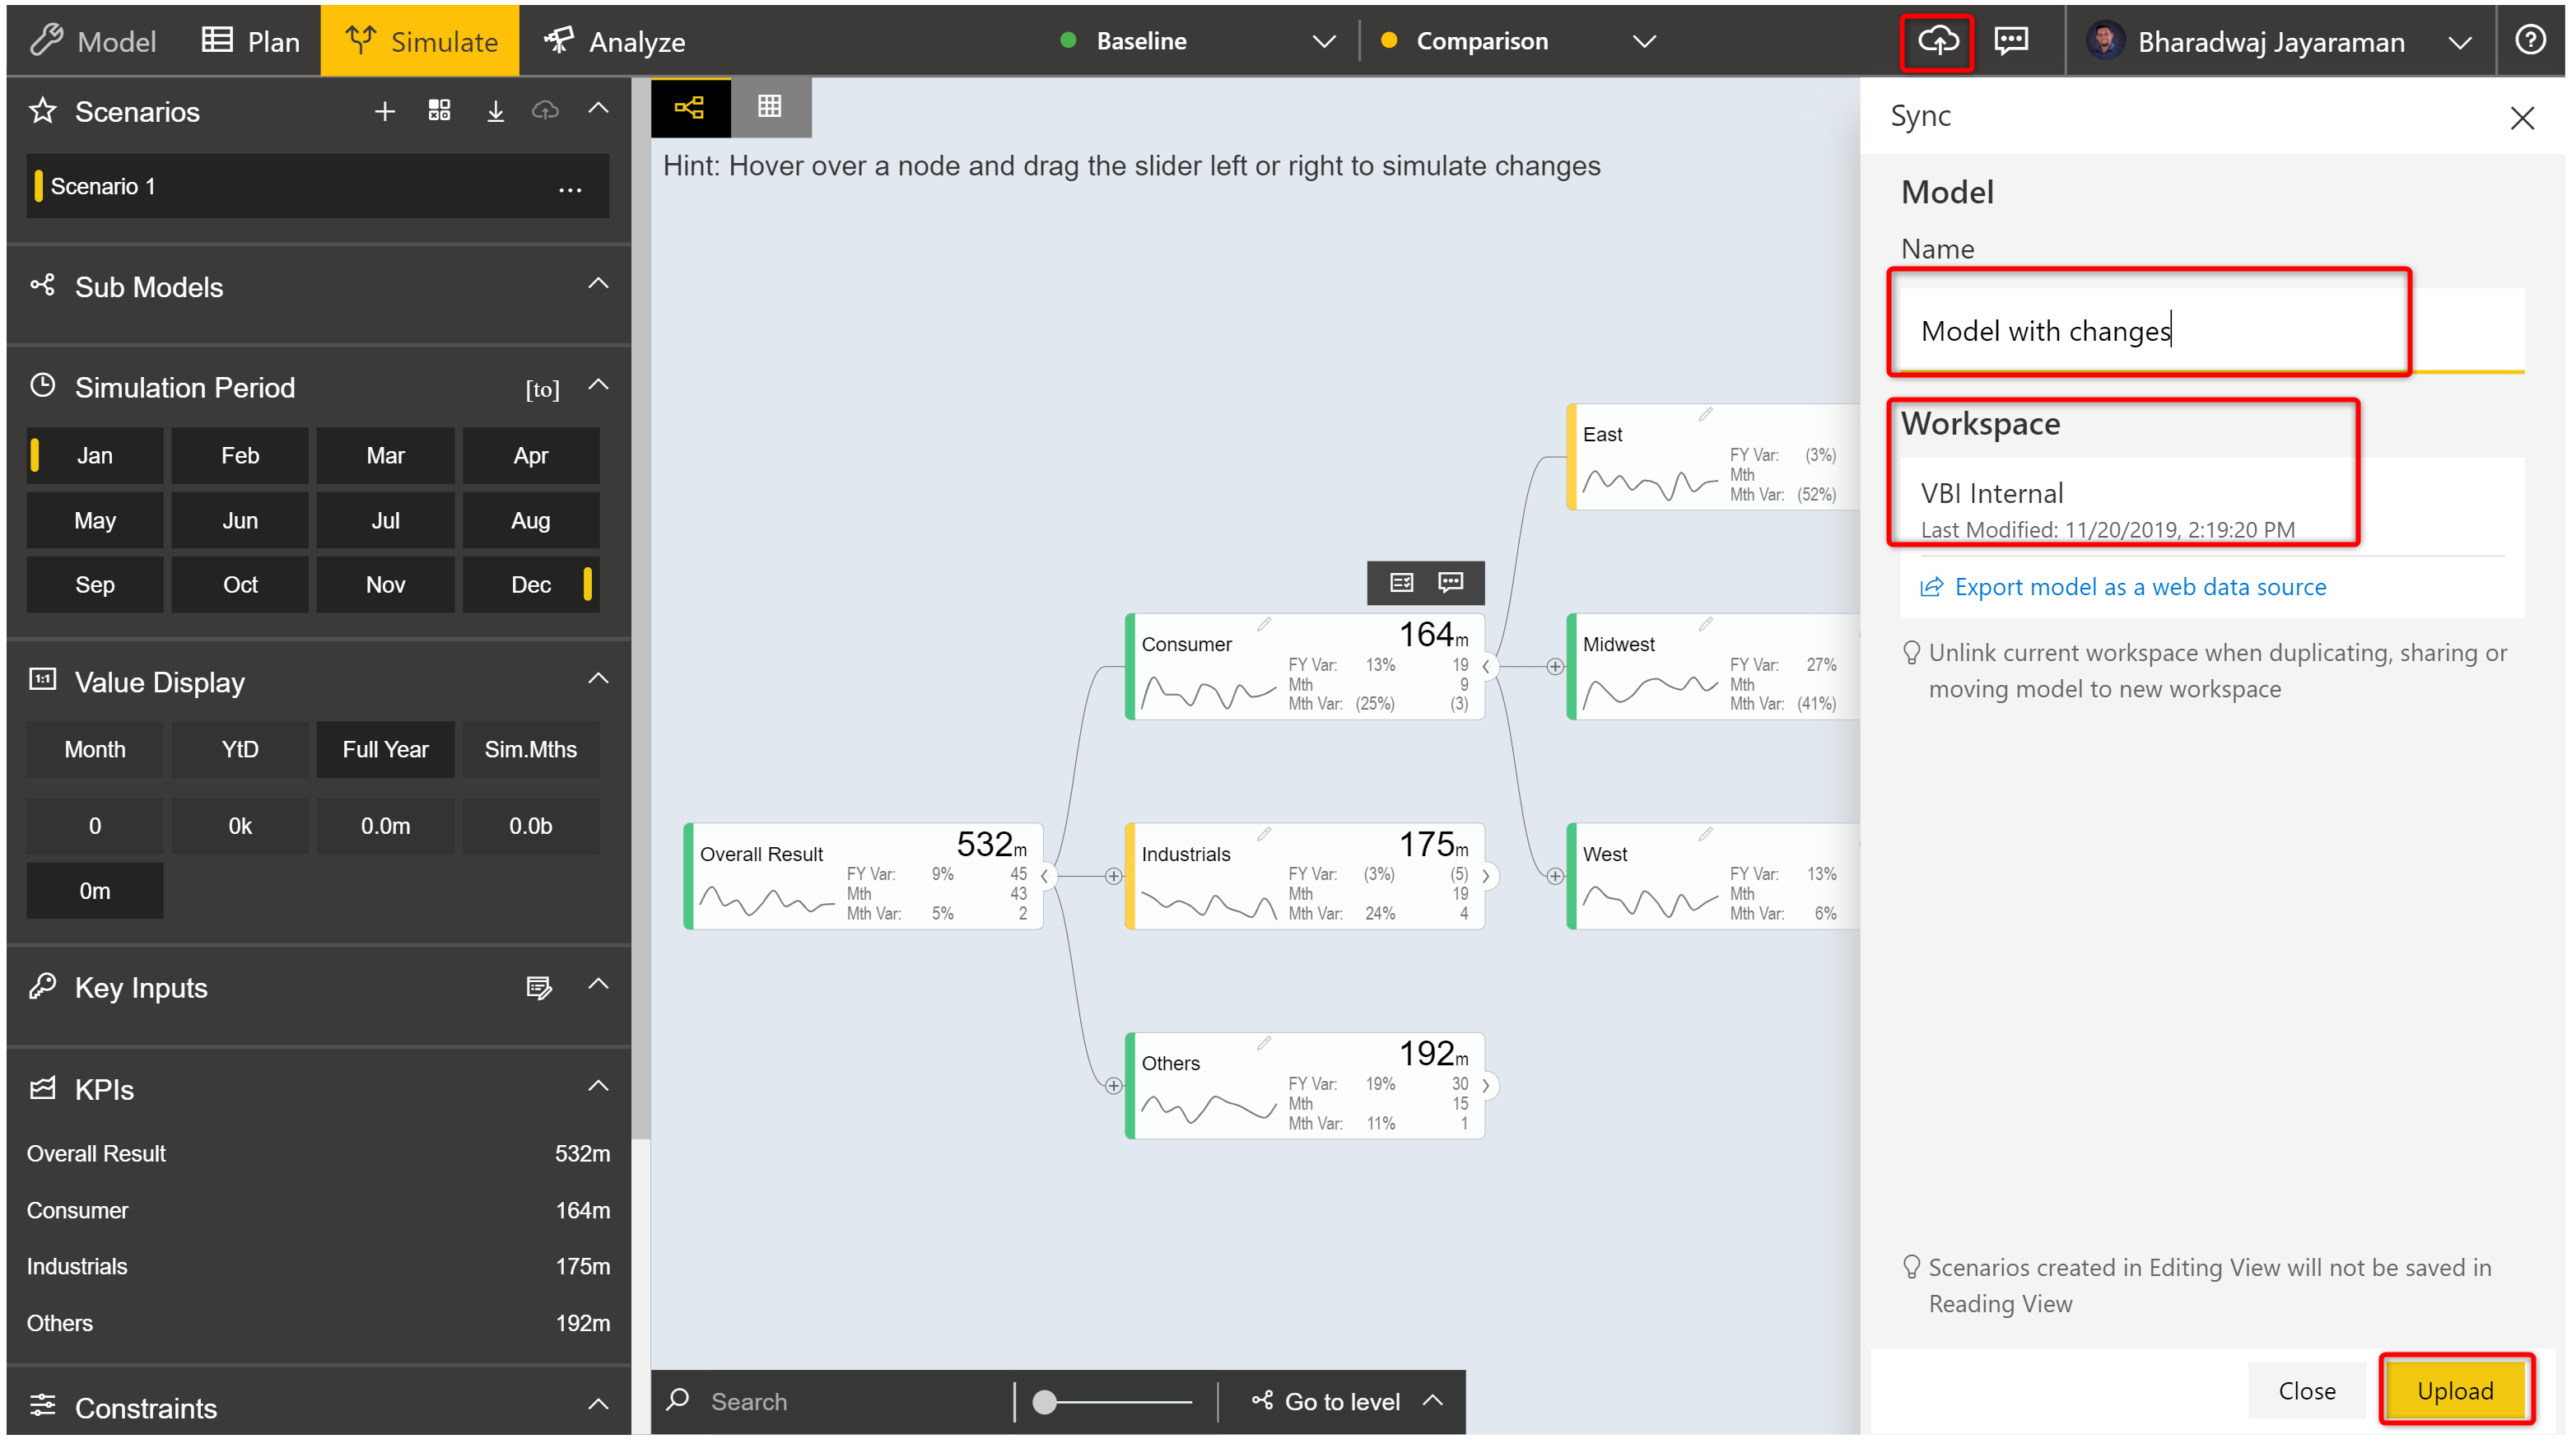
User can synchronize and store the changes to the workspace by clicking the ‘Sync’ icon, naming the model, and clicking ‘Upload’.
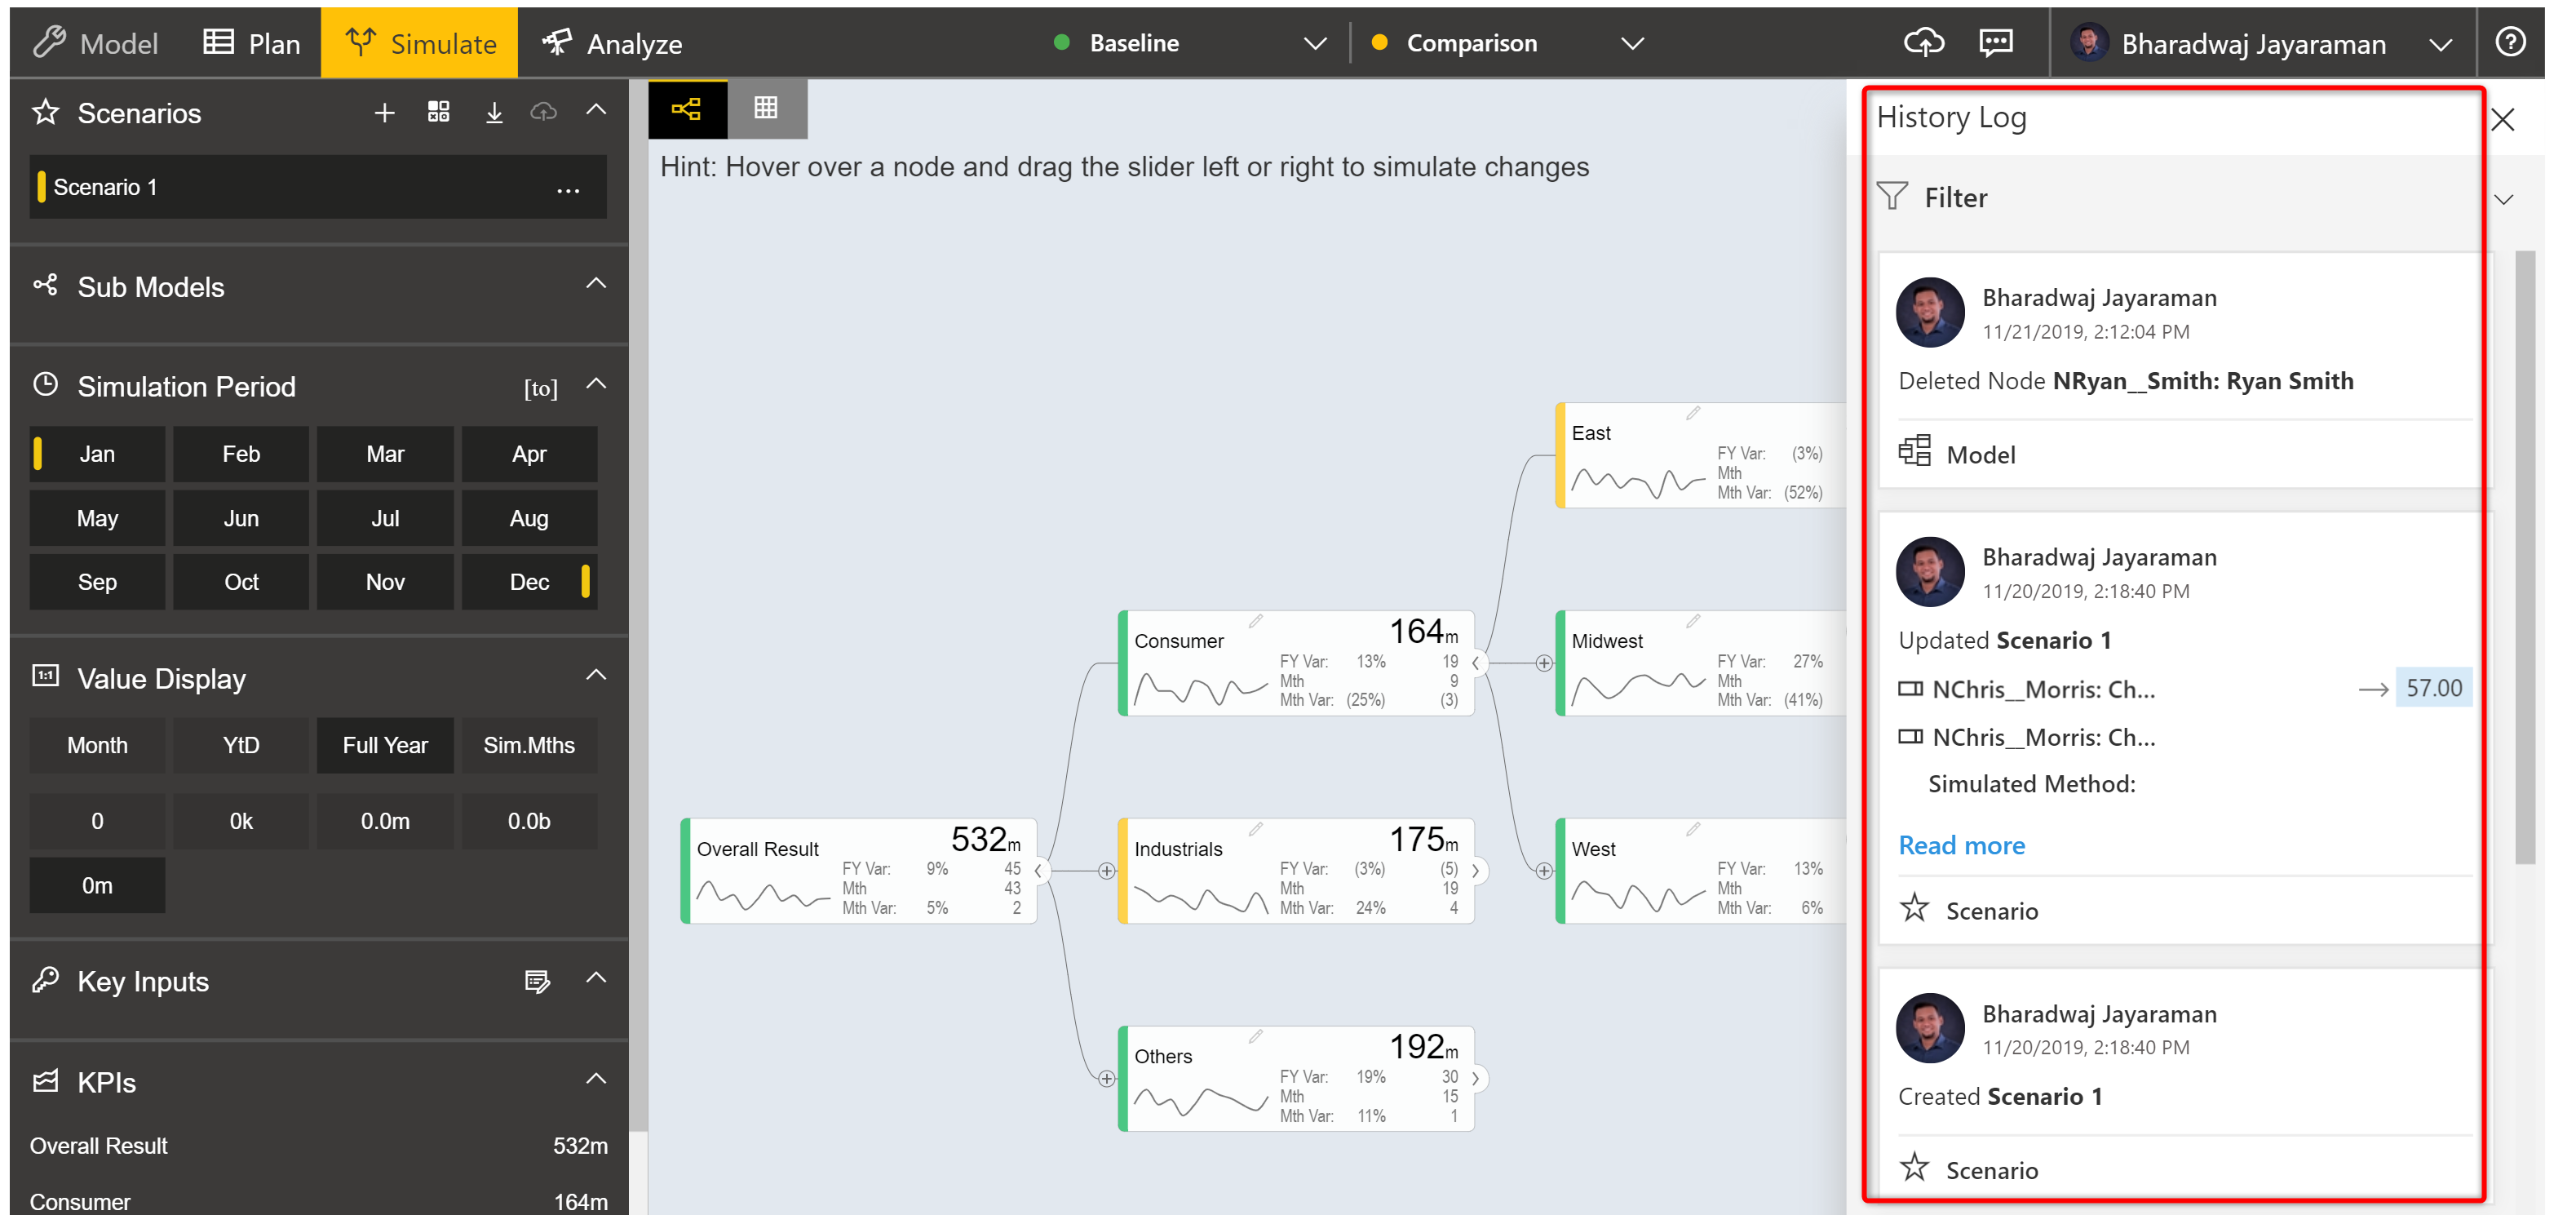
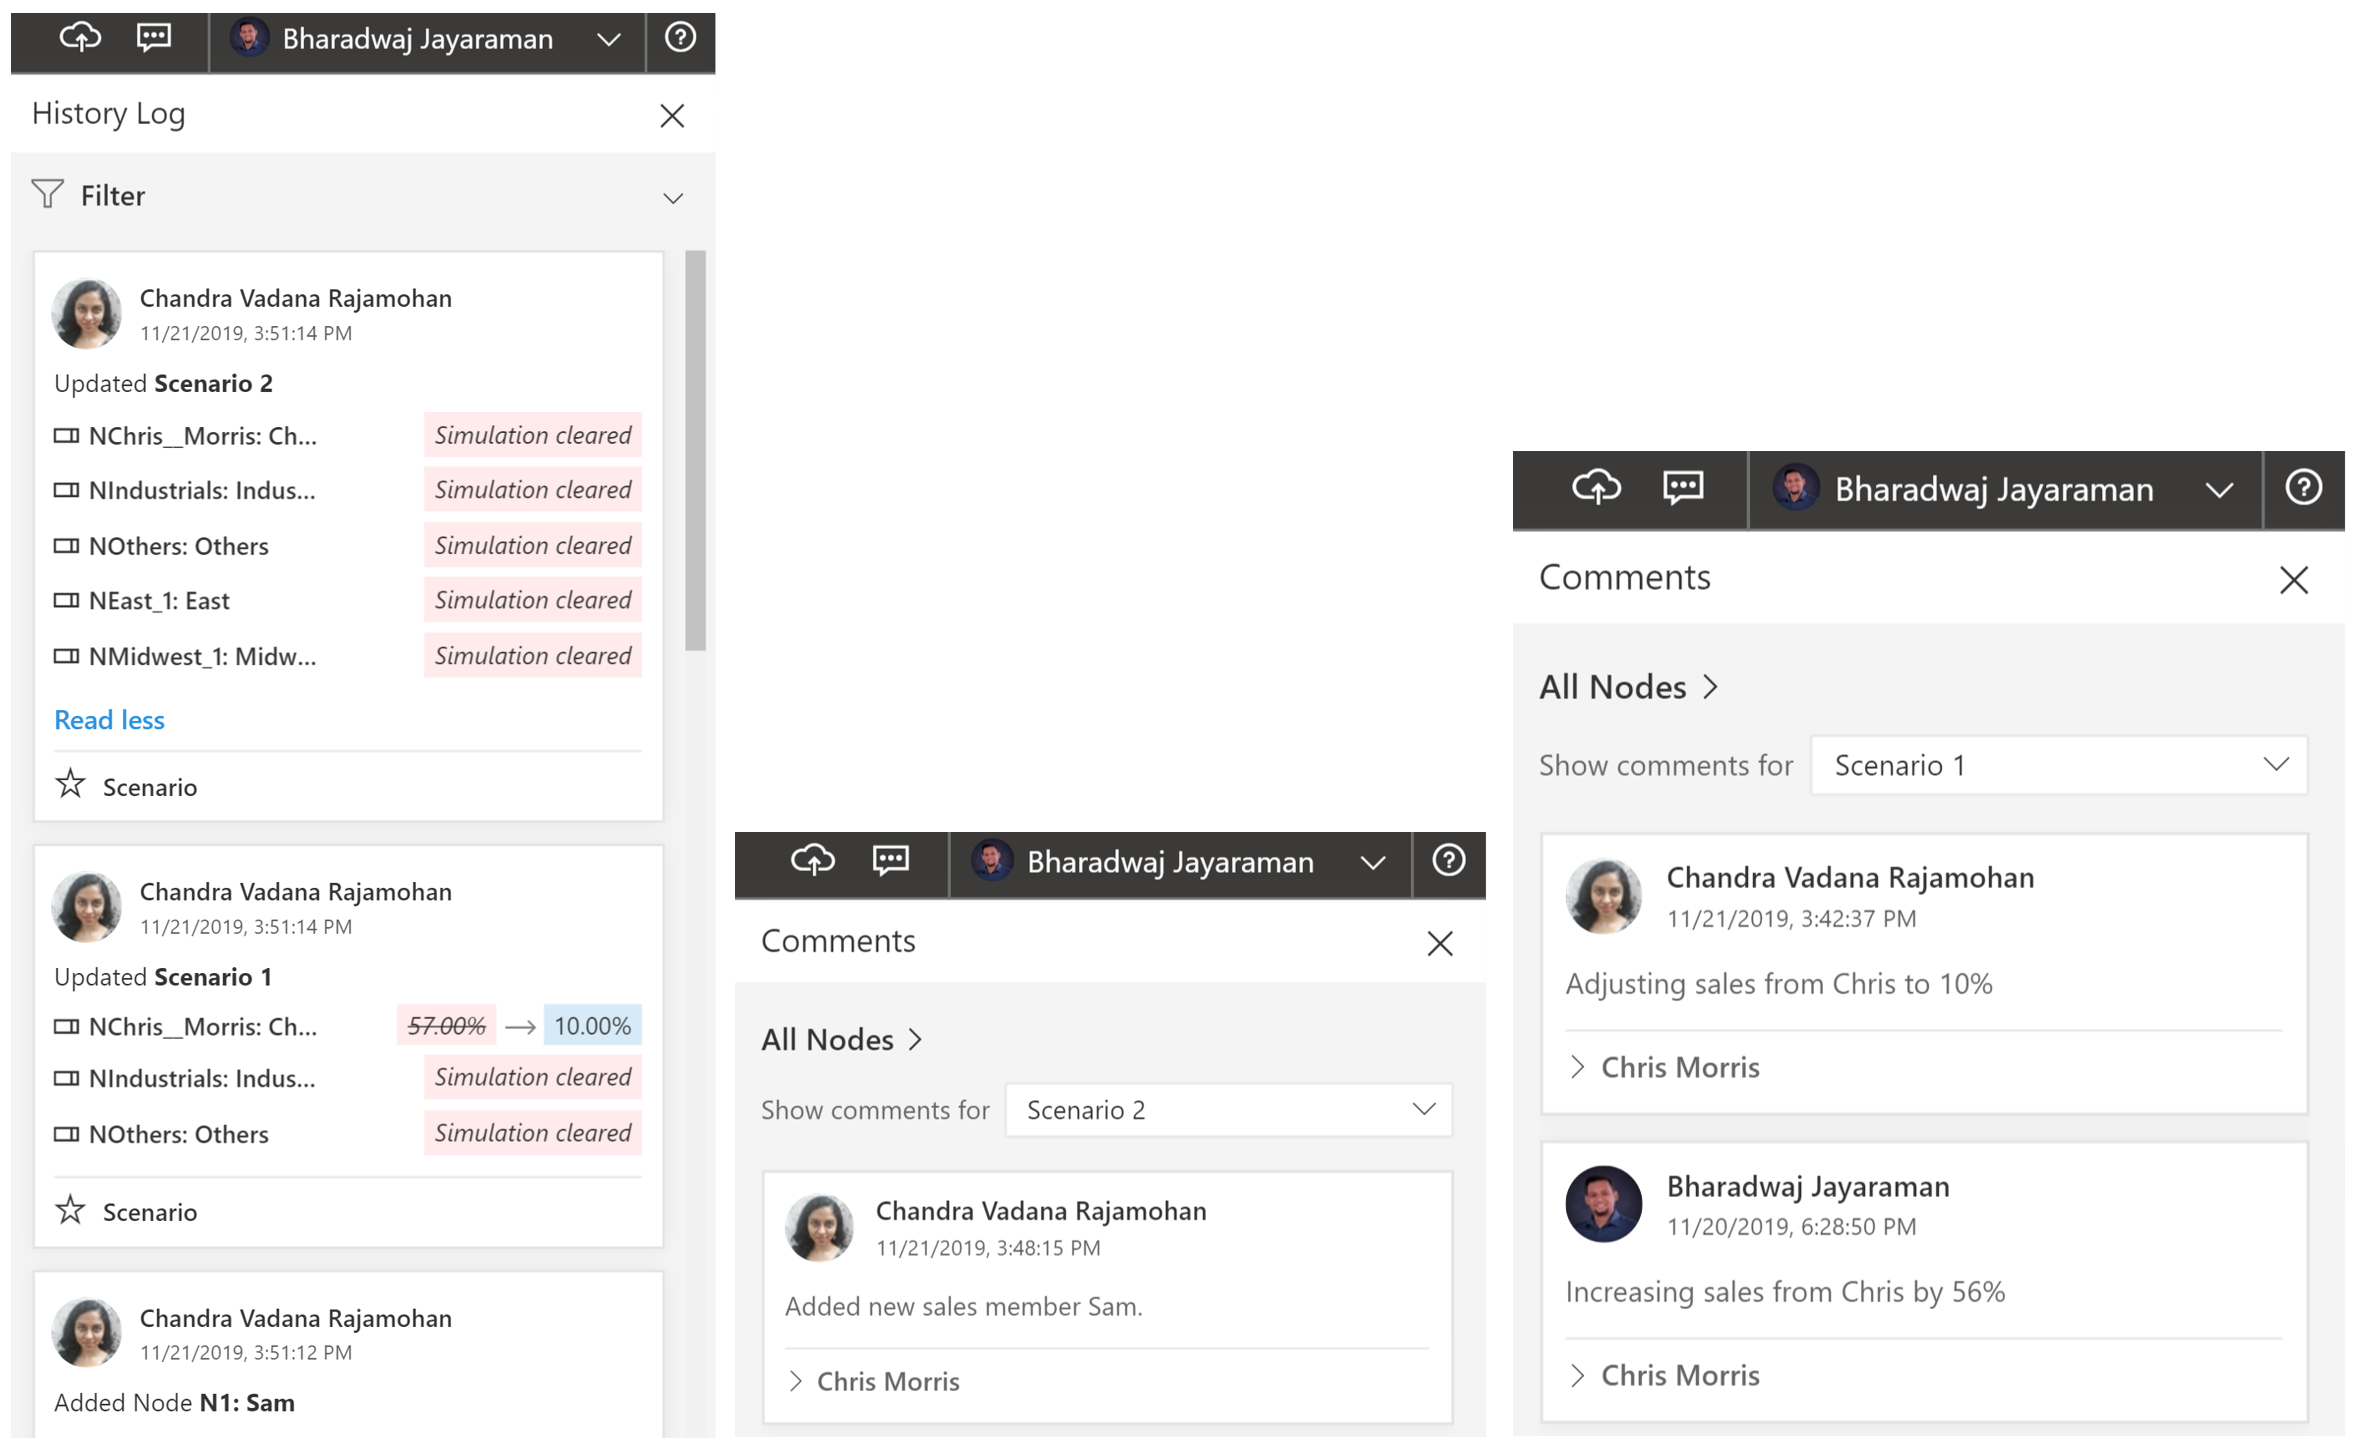
The ‘History Log’ has captured the model and scenario level changes made by the user in a chronological order. This icon helps in auditing the changes in the ValQ model.
The comments can also be tracked under the model level ‘Comments’ icon. Comments window displays all user comments at Scenario-Node level.
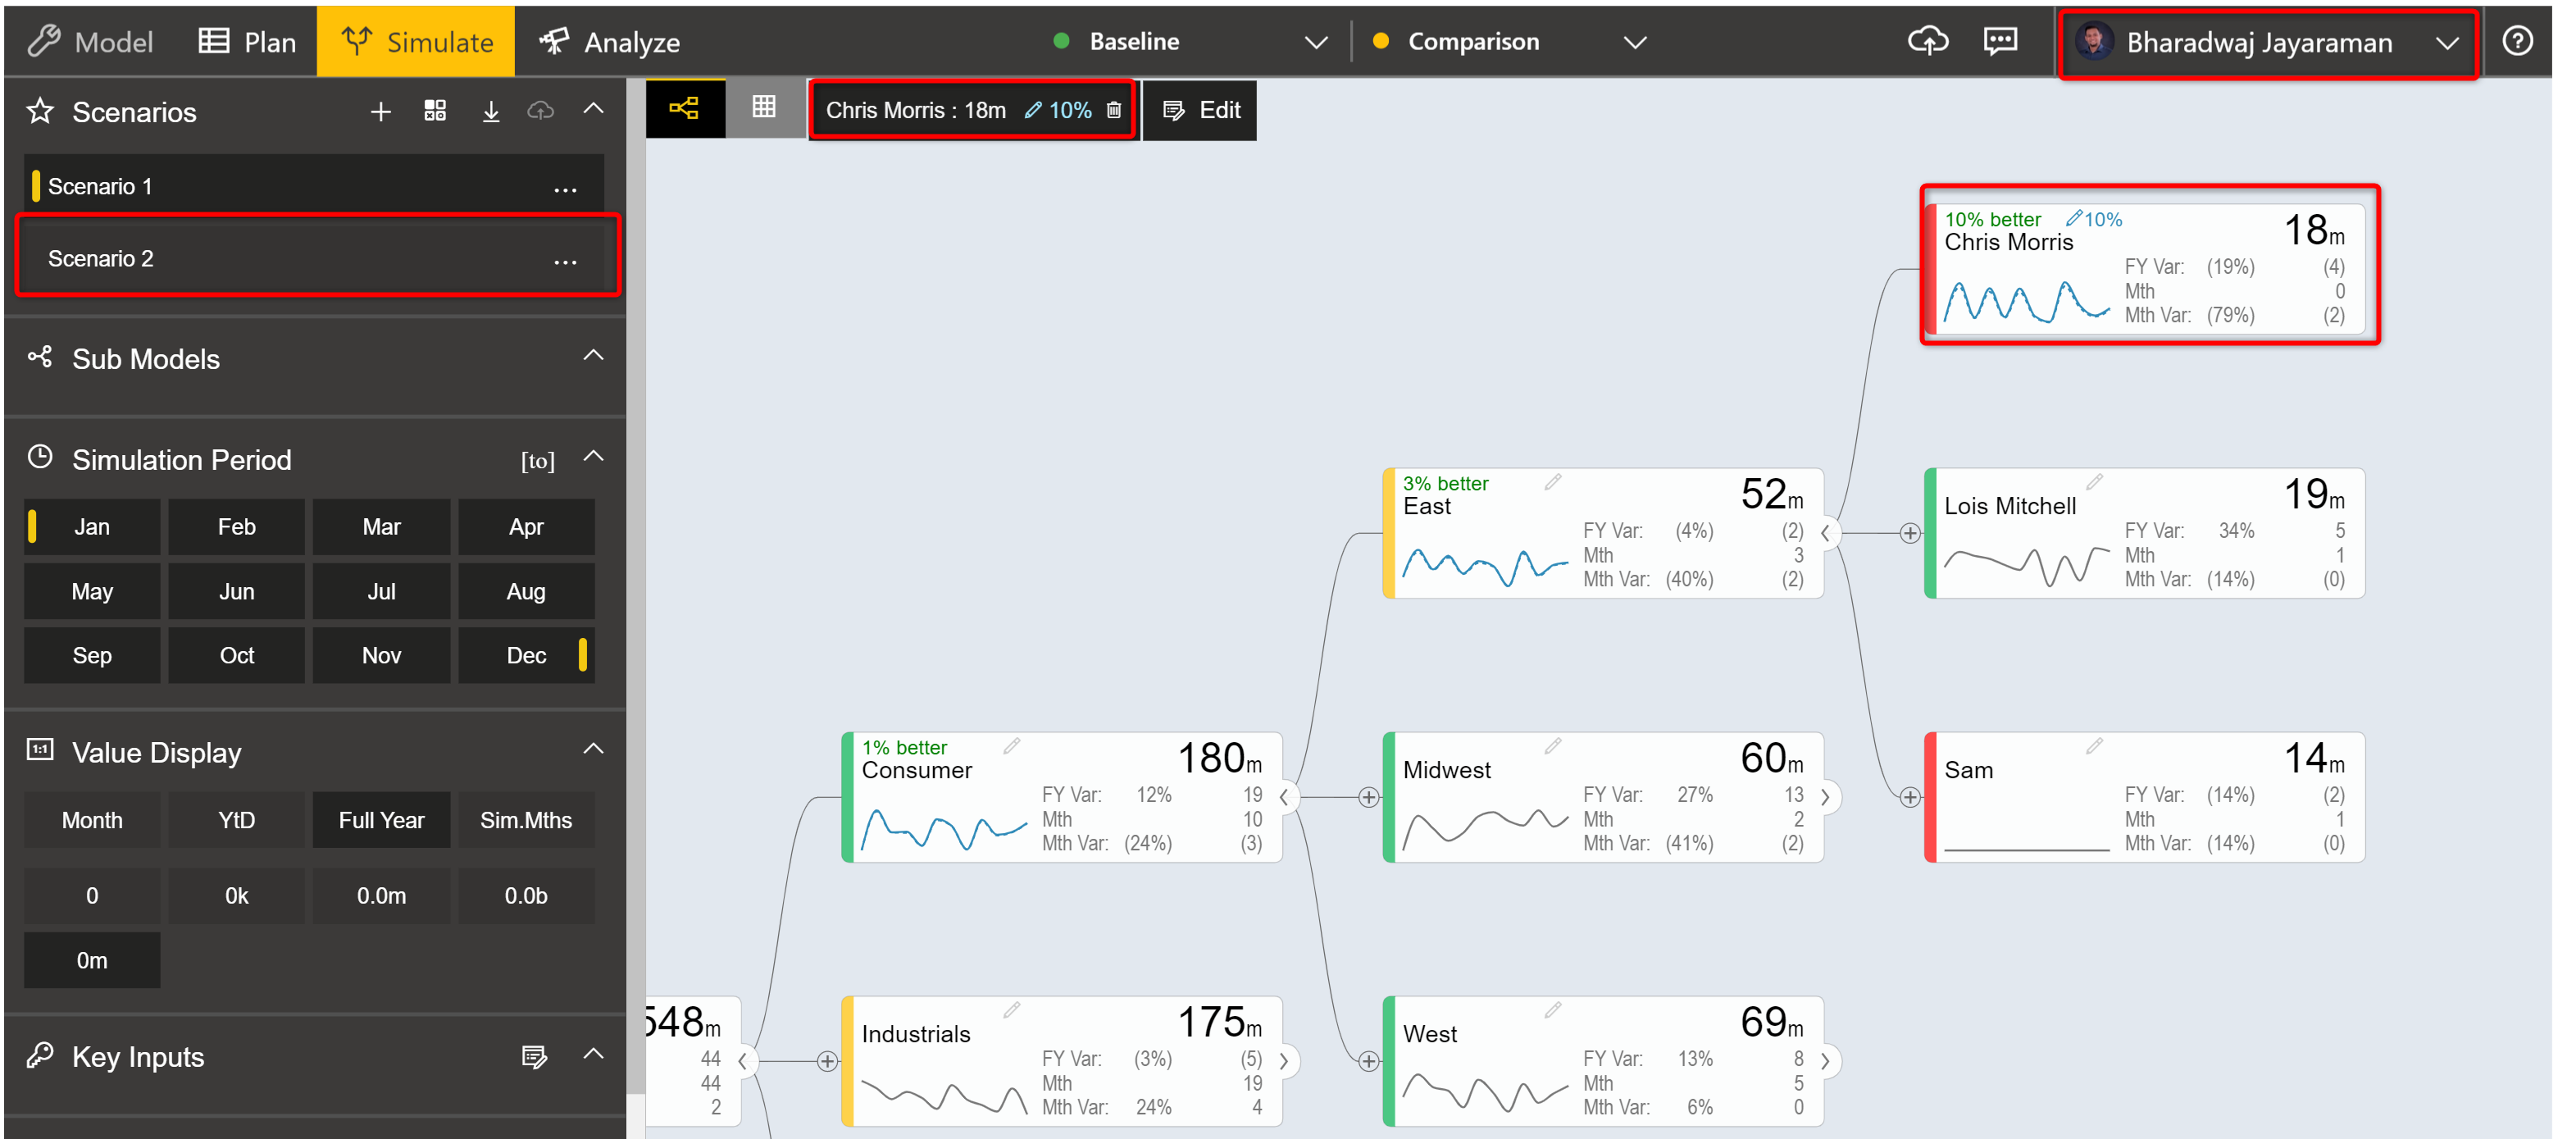
ValQ has also been made collaborative - Users who are a part of the same workspace can also collaborate on the same ValQ model. Assuming a second user accessing the same model simulates on the existing scenario, creates additional scenario, adds a new node, and comments on the changes done. To store these changes, the user also synchronizes them to the workapce.
Once the first user logs in, all the changes made by the second user are synced up and displayed at the ValQ canvas.
The changes at a Model/Scenario level are captured at the History Log. The comments in chronological order between users are displayed at a Node-Scenario level
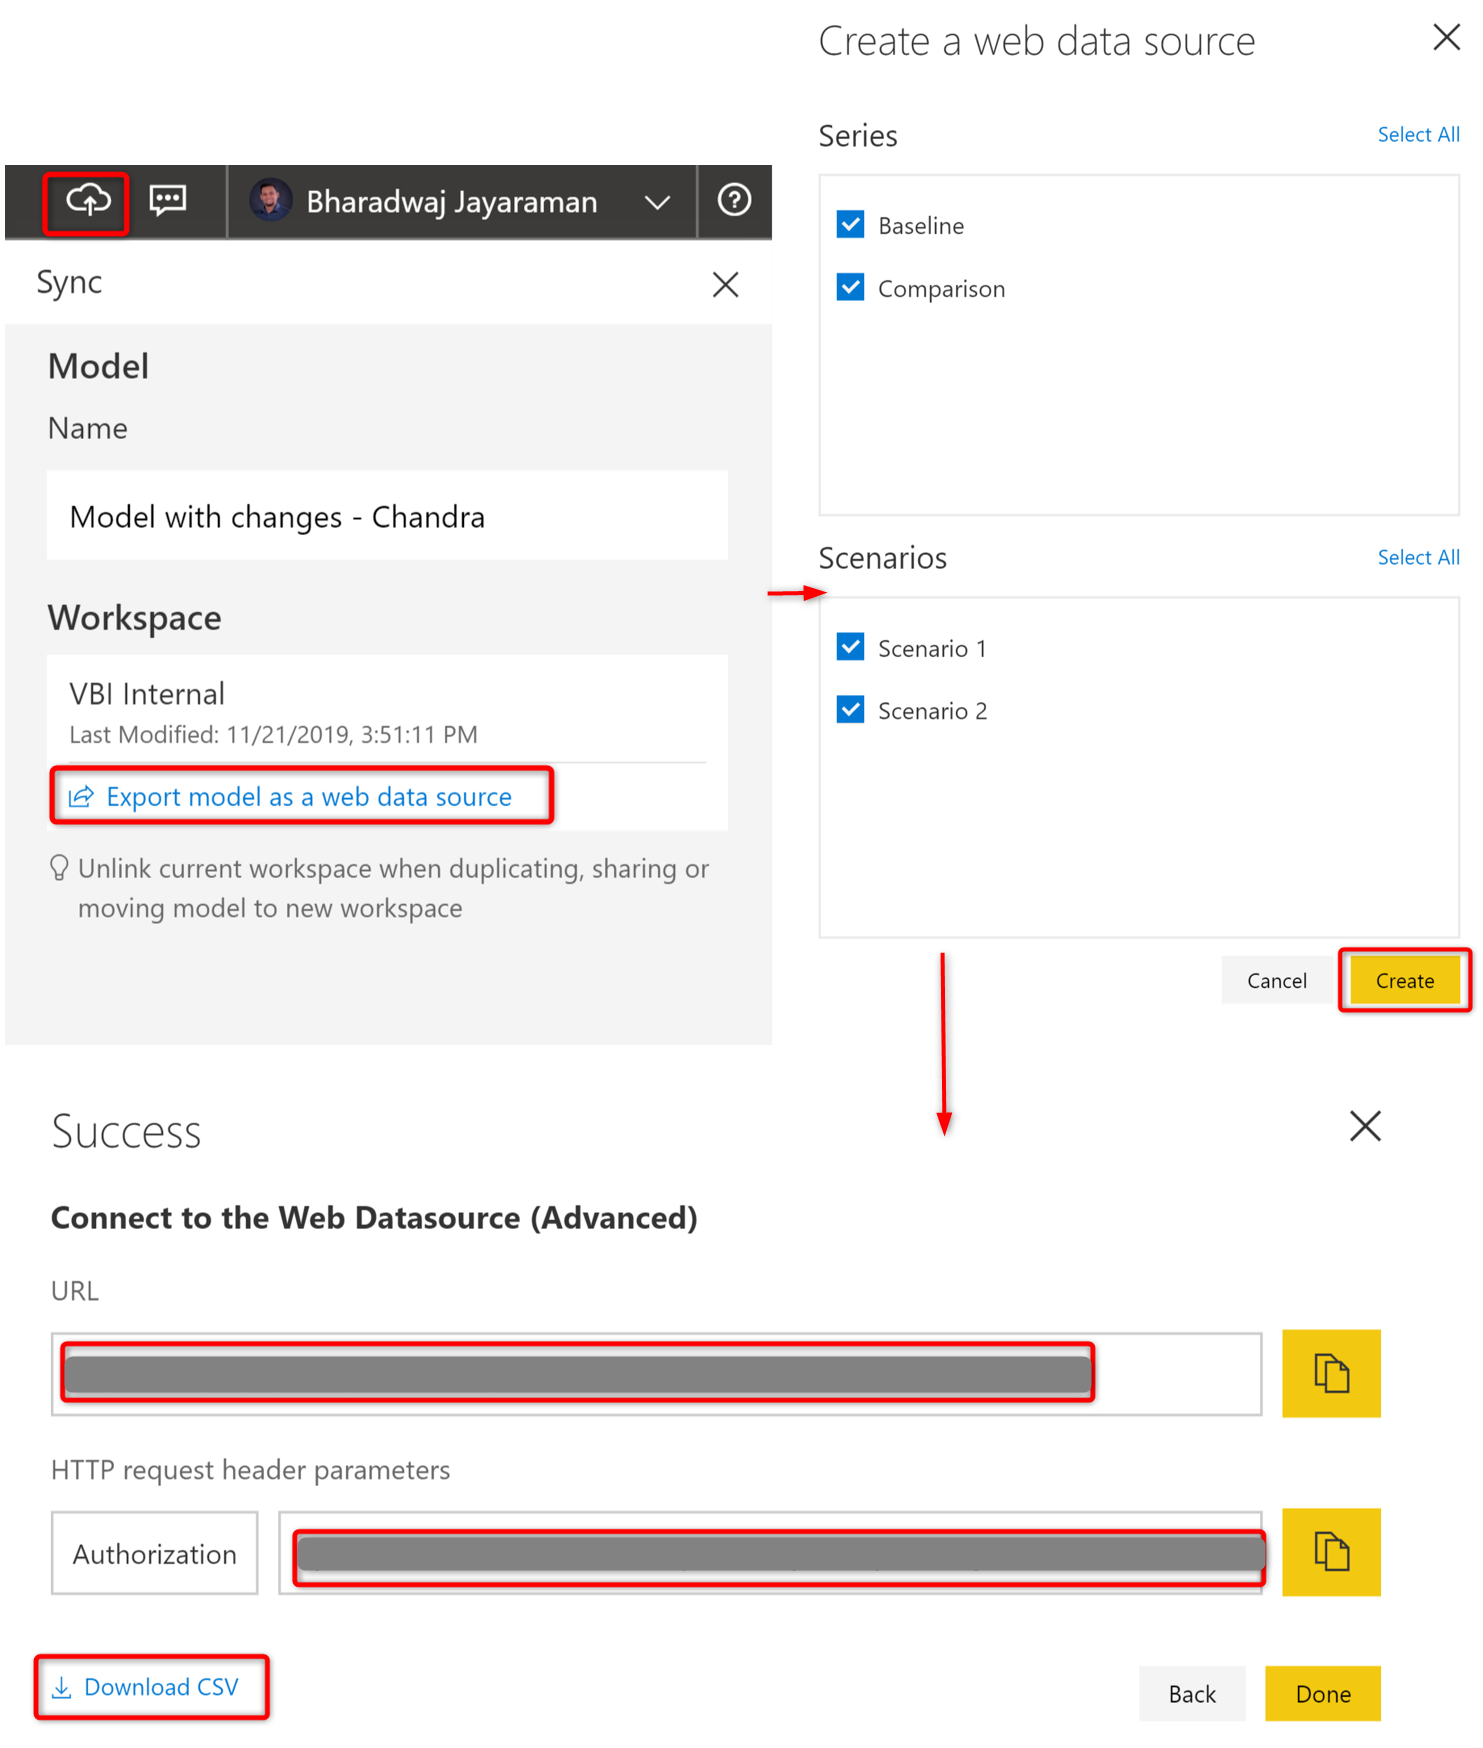
Lastly, users can also export their export all the data values fed and generated from ValQ - namely, basline, comparison, and scenario data. Under the ‘Sync’ window, users can export their ValQ data by clicking ‘Export model as a web data source’, making the data series and scenario selection, and clicking ‘Download CSV’ (through Power BI Service) or copy-pasting the URLs into Excel (through Power BI Desktop)
In Excel, the copied URLs are fed into the ‘From Web’ - ‘Advanced’ window to generate the exported data.
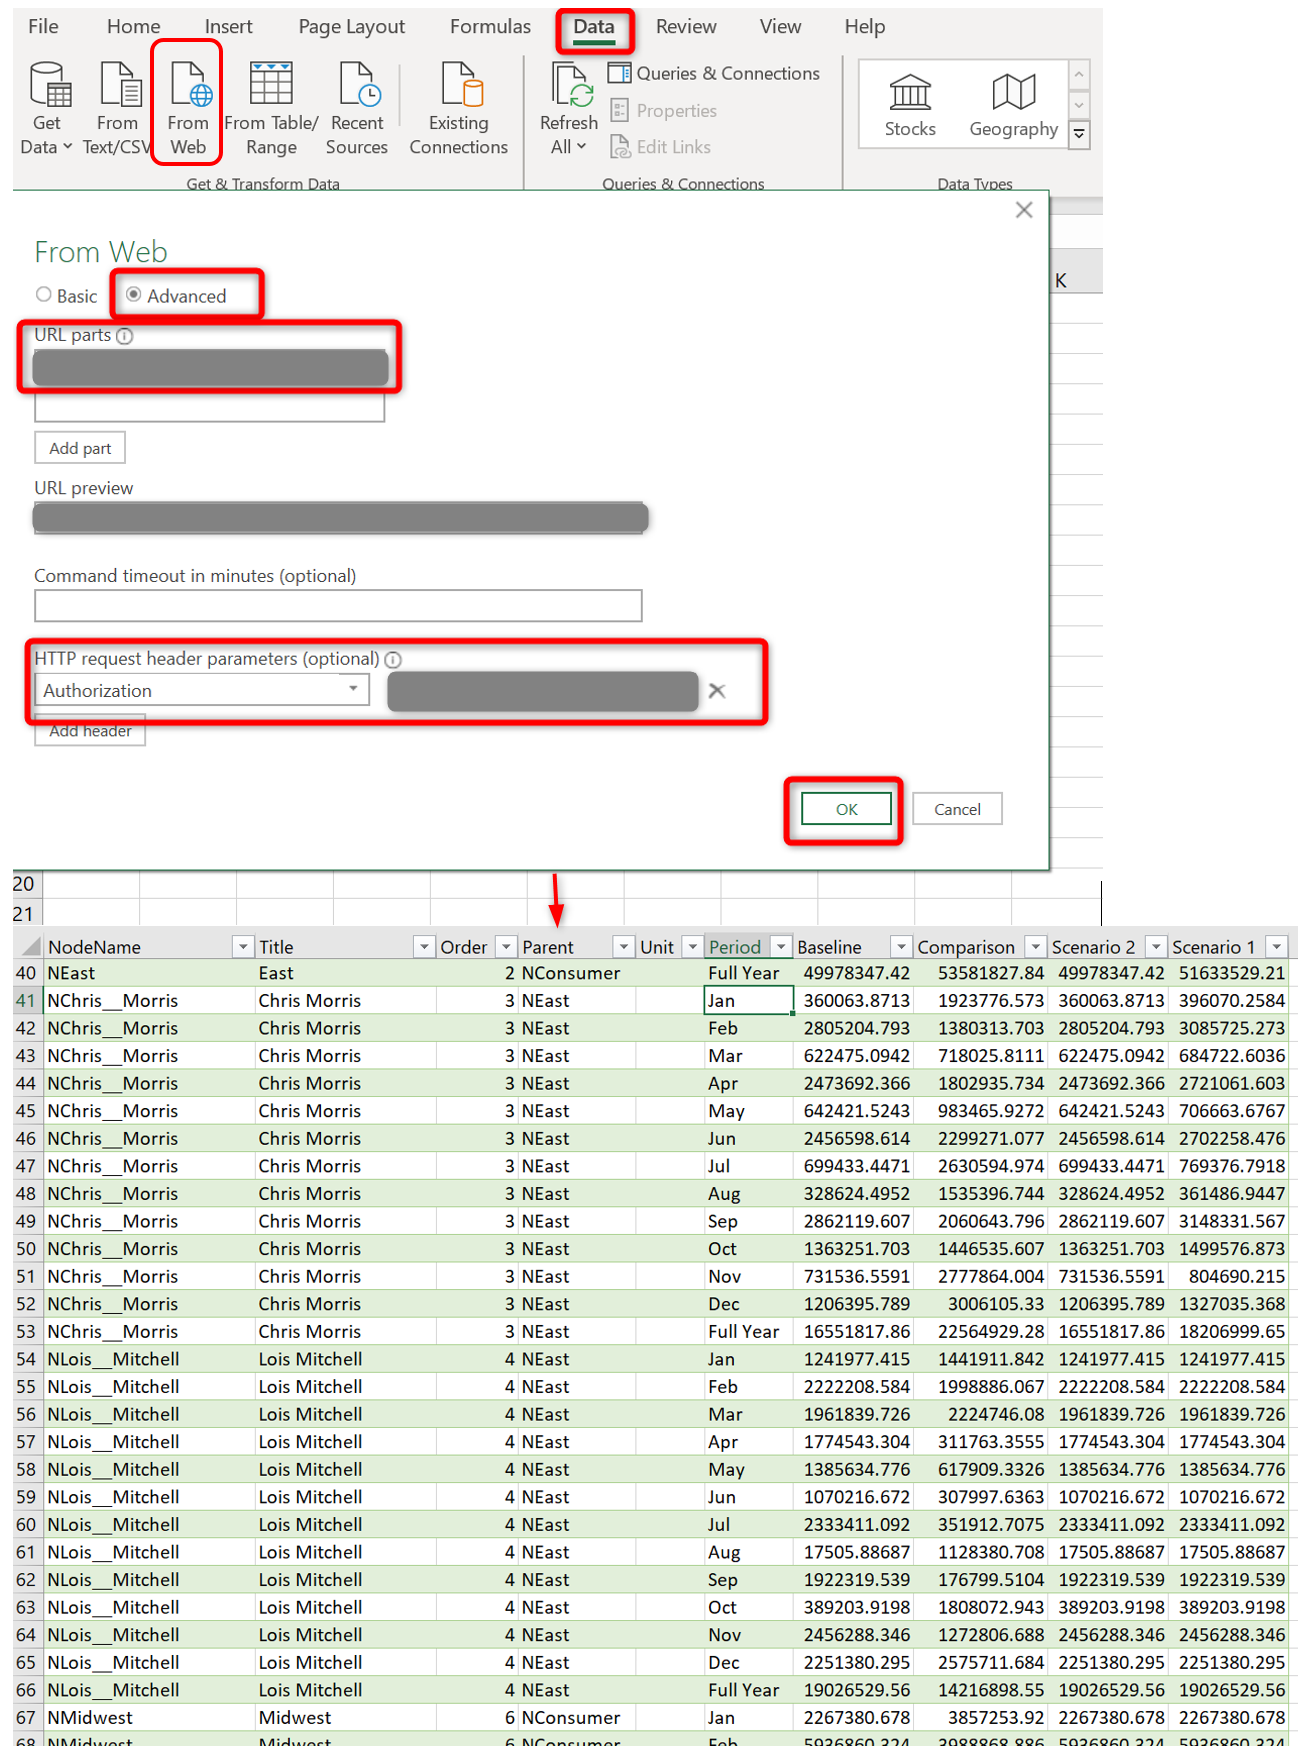
Users can also run further simulations to their scenarios and instantly synchronize the new data by refreshing the data query within ‘Queries & Connections’ in Excel.
